Building a Mountain Dulcimer - Part 3
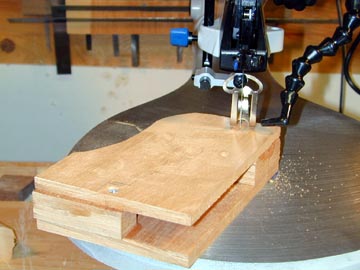 I
glued the other cheek to the scrollhead first thing in the morning and took care
of some chores and came back when the glue was dry. As you might just see in
this photo, I used screws outside the lines of the scrollhead profile to keep
the parts in line while clamping. Here the scrollhead is (appropriately) on my
Scroll Saw being cut out to shape. Wood that's harder than mahogany will
have to be cut out on the bandsaw, as the scroll saw lacks the oomph for walnut
and its tough ilk. On the bandsaw, I switch to a 1/4 inch blade for this.
I
glued the other cheek to the scrollhead first thing in the morning and took care
of some chores and came back when the glue was dry. As you might just see in
this photo, I used screws outside the lines of the scrollhead profile to keep
the parts in line while clamping. Here the scrollhead is (appropriately) on my
Scroll Saw being cut out to shape. Wood that's harder than mahogany will
have to be cut out on the bandsaw, as the scroll saw lacks the oomph for walnut
and its tough ilk. On the bandsaw, I switch to a 1/4 inch blade for this.
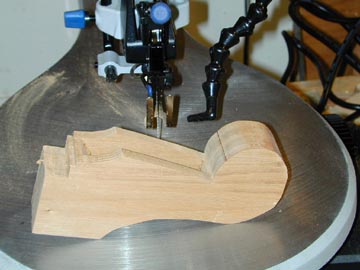 Here's
the scrollhead cut out but not sanded. The black line on the scroll was where I
broke a scroll saw blade. It will be sanded away.
Here's
the scrollhead cut out but not sanded. The black line on the scroll was where I
broke a scroll saw blade. It will be sanded away.
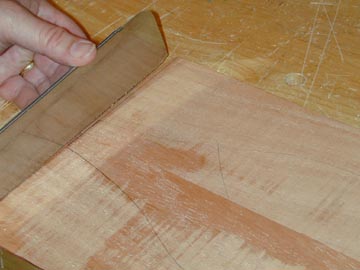
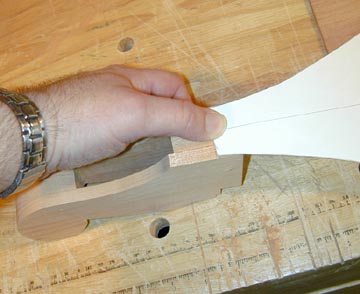 The
part of the scrollhead that extends into the body of the instrument needs to be
squared down with recesses to match the thickness of the sides, top, and back.
The sides will meet it at an angle, so I use the cutout profile of the top to
mark the angle on the top and bottom of the scrollhead. This cutout is a
full-size pattern of the top and back plates that I will also use to trace the
shape on the top and back boards.
The
part of the scrollhead that extends into the body of the instrument needs to be
squared down with recesses to match the thickness of the sides, top, and back.
The sides will meet it at an angle, so I use the cutout profile of the top to
mark the angle on the top and bottom of the scrollhead. This cutout is a
full-size pattern of the top and back plates that I will also use to trace the
shape on the top and back boards.
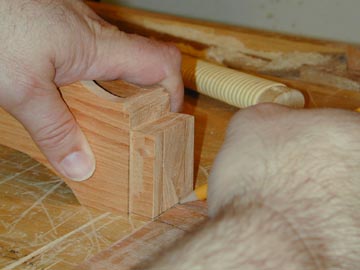
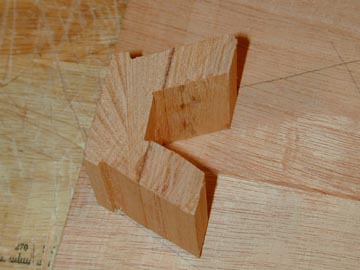
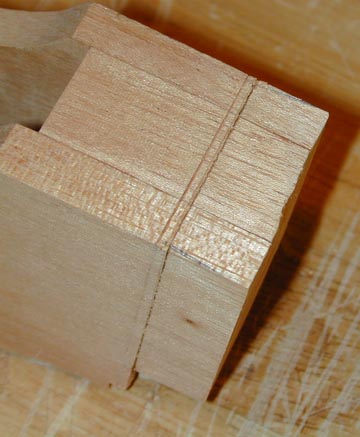 Saw
cuts all around to the depth of the sides or top and back; you can just barely
see the angled marks where the sides will come in.
Saw
cuts all around to the depth of the sides or top and back; you can just barely
see the angled marks where the sides will come in.
 Before
going further with the scrollhead, the top end of the back plate must be trimmed
off to where the scrollhead will be attached.
Before
going further with the scrollhead, the top end of the back plate must be trimmed
off to where the scrollhead will be attached.
 Holding
the back plate against the bottom of the scrollhead, I mark the thickness to be
removed.
Holding
the back plate against the bottom of the scrollhead, I mark the thickness to be
removed.
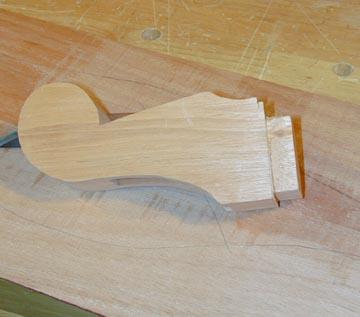 And
here is the scrollhead ready to be mounted.
And
here is the scrollhead ready to be mounted.
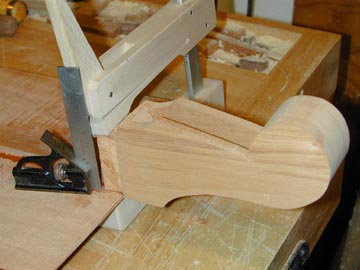 A
single clamp covers the whole gluing surface. The square makes sure the glue-up
doesn't go awry.
A
single clamp covers the whole gluing surface. The square makes sure the glue-up
doesn't go awry.
 The
tailpiece is band-sawed from two glued-up blocks. The notches for the sides are a
little deep; they'll be trimmed down to match the sides after the sides are
glued on.
The
tailpiece is band-sawed from two glued-up blocks. The notches for the sides are a
little deep; they'll be trimmed down to match the sides after the sides are
glued on.
 The
tailpiece is glued with three clamps simply by placing it along the lines draw
on the back plate.
The
tailpiece is glued with three clamps simply by placing it along the lines draw
on the back plate.
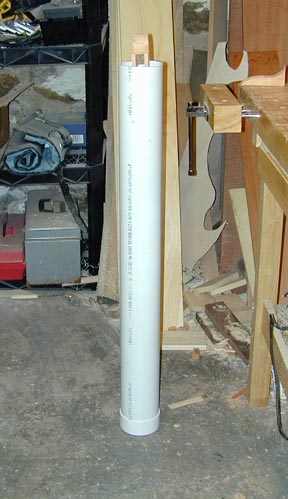 So!
While that glue is setting, we'll start soaking the first side prior to bending
it. The vessel is a piece of four-inch PVC pipe with an end cap on it, and it's
filled with hot tap water. A piece of scrap is holding the side piece down to
keep it from bobbing half out of the water. I've commented at length on bending
sides in my guitar project. I didn't get any better pictures this time, though I
tried, and I don't have any new insights. Click
here and read all about it, then come back...
So!
While that glue is setting, we'll start soaking the first side prior to bending
it. The vessel is a piece of four-inch PVC pipe with an end cap on it, and it's
filled with hot tap water. A piece of scrap is holding the side piece down to
keep it from bobbing half out of the water. I've commented at length on bending
sides in my guitar project. I didn't get any better pictures this time, though I
tried, and I don't have any new insights. Click
here and read all about it, then come back...
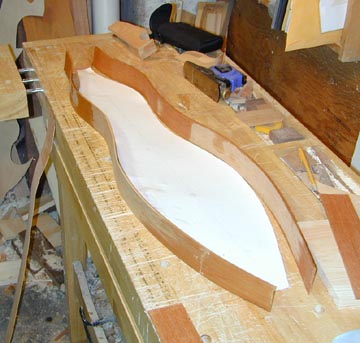 Right!
Whew! That was tough! But here's the final result. I need to wait overnight for
the sides to dry out before they can be glued. There's not much else left to do
after that, just the soundholes and the fingerboard. Tune in later for the
shocking finale...
Right!
Whew! That was tough! But here's the final result. I need to wait overnight for
the sides to dry out before they can be glued. There's not much else left to do
after that, just the soundholes and the fingerboard. Tune in later for the
shocking finale...
Previous Start
of Dulcimer Home
Next
Resources Glossary
of Woodworking and Lutherie Terms
Copyright © 2003 Stephen Miklos