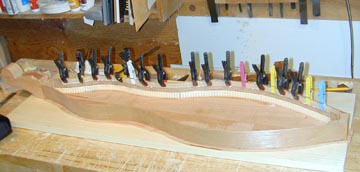

The linings are glued along the top edge of the ribs and held to dry, traditionally with clothespins. I keep forgetting to buy a bag of clothespins, so I have to make do with what small clamps and clips I have around.
This photo is of a later dulcimer project at the same stage of construction, after I had acquired enough clothespins to really do the job right. This is known as the obligatory photo in any stringed-instrument construction presentation.
After the glue has cured on the linings, the edges are leveled all around with a block plane and a small sanding board, in preparation for attaching the soundboard.
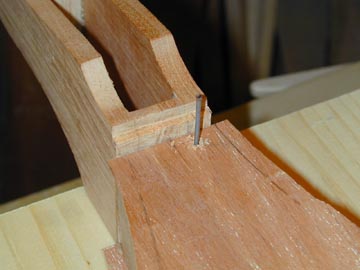
To keep the soundboard in place while gluing up, I put in nails in places where the fretboard will eventually cover the holes. I don't pound the nail in; I just drill a hole and drop it in.
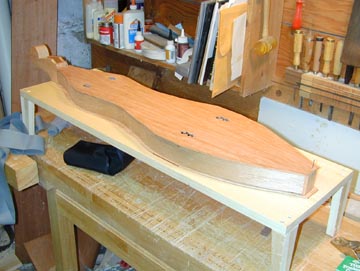
For this and other jobs in dulcimer building, I find a mini-table or workboard helpful.
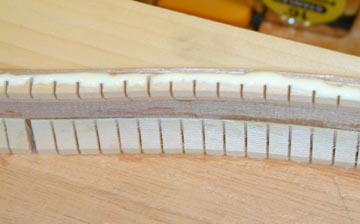
A small bead of glue all along the linings and the upper contact surfaces of the head piece and tail block.
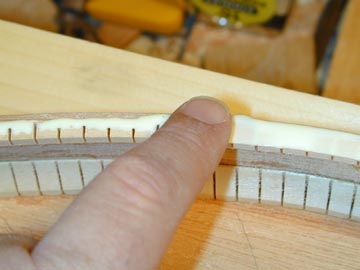
Don't let anyone sell you a glue spreader. Most of us are born with ten of the best.

To assure contact all along the edges, in addition to clamps I used a roll of the stretchy stuff medical supply stores sell for physical therapy exercises.
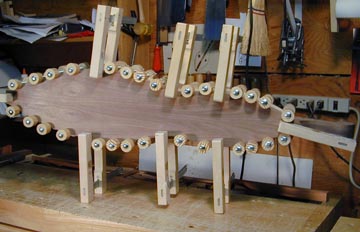 Spool
clamps are an alternative to the athletic elastic shown above. They have the
advantage of allowing you to see the joint while you are clamping it, to check
for any gaps. Sometimes the tape may not be stretched tightly enough in some
areas, especially if the tape is one long piece. This can result in a gap
underneath that section of tape.
Shown here is one feature of the luthier's cam clamps that I find very useful. by standing the assembly up on its side like this, you can have a good view of the seam while you're putting the spool clamps on. Later while the glue is curing, you lay the assembly flat, resting on the luthier's clamps.
When using these clamps, you must be sure to trim the soundboard and back to within about an eight of an inch of its final shape all around, since the clamps only reach in less than half an inch.
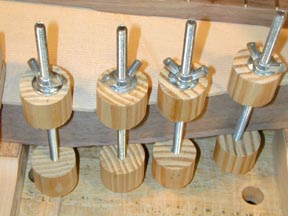 Here's
a close-up of the spool clamps. Very simple! The bolt is a carriage bolt, that
has a square section under the head which you pound into the wood to keep the
bolt from turning at one end. The wooden parts are cutoffs from a one-inch
dowel. Make sure the cuts are square, or the pressure exerted by the clamp may
be uneven, causing it to tend to slide off the edge or to push in the top so
that it glues with a curve in it.
Previous Start
of Dulcimer Home
Resources Glossary of Woodworking and Lutherie Terms
Copyright © 2003 Stephen Miklos